Initially I want to deploy a openai-web on my remote server (Free Oracle Server) to use the DeepSeek API. To protect the service, I can establish a Wireguard connection.
So I ask Qwen to generate a template for me. However, the Qwen guides me to modify AllowdIPs=0.0.0.0/0, ::/0 within the wg0.conf. And that leads to my fix to the server the whole afternoon.
I lose my connection to the remote server immediately when I apply the above settings. The reason is, all the traffic (including IPv4 and IPv6) is routed through the WireGuard tunnel. This also includes my traffic to the server’s public IP. As a result, when the VPN is activated, the connection to the server breaks because the return traffic is routed through the tunnel instead of directly back to the client. If the server does not have proper routing rules or NAT configured, the return traffic from the server will be sent back through the WireGuard interface instead of the original public interface. This creates a loop or breaks the connection.
Here comes the embarrassing thing. I cannot restore the remote connection, so that I cannot stop such the service. And since I cannot stop the service, I cannot gain access to my remote servers. This also creates a loop. Therefore, the only way is to resort to the cloud out-of-band console for recovery.
Cloud Console
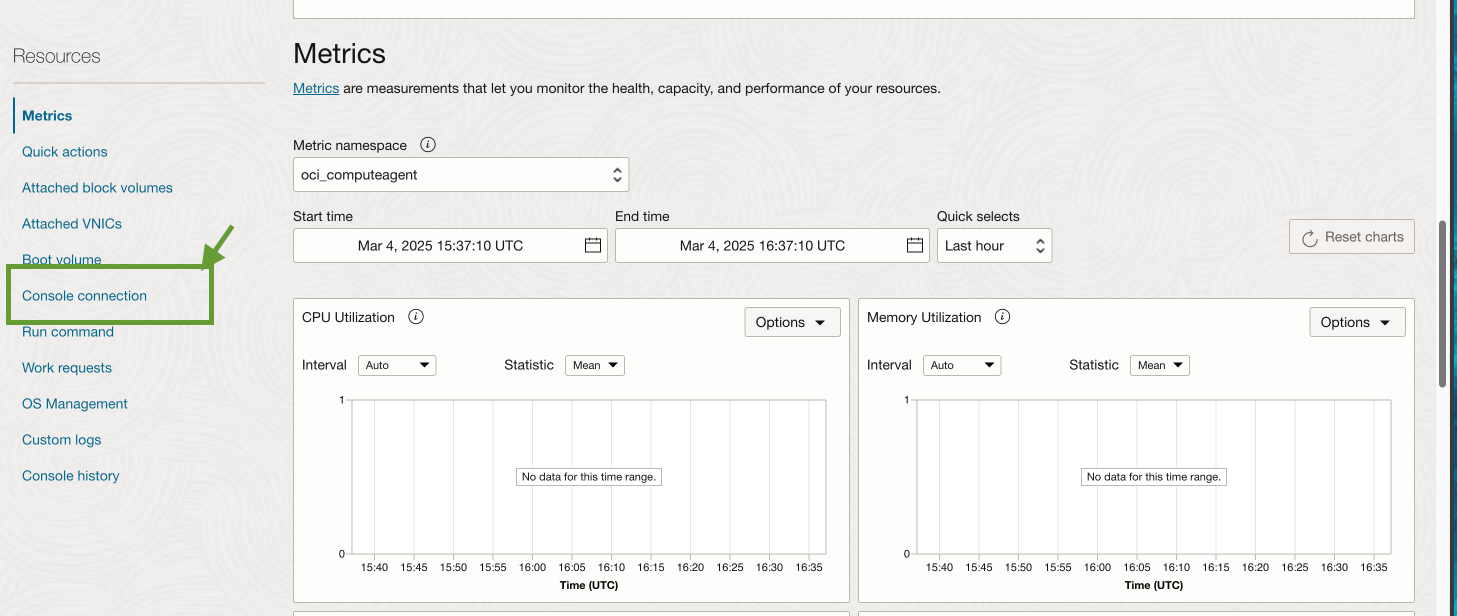
Find the instances on the cloud console and choose the console connection on the left bottom.
 Then
Then Create Local Connection and upload the necessary key file. Then you will see an active cloud shell. Click the right ... and Copy Serial Console Connection.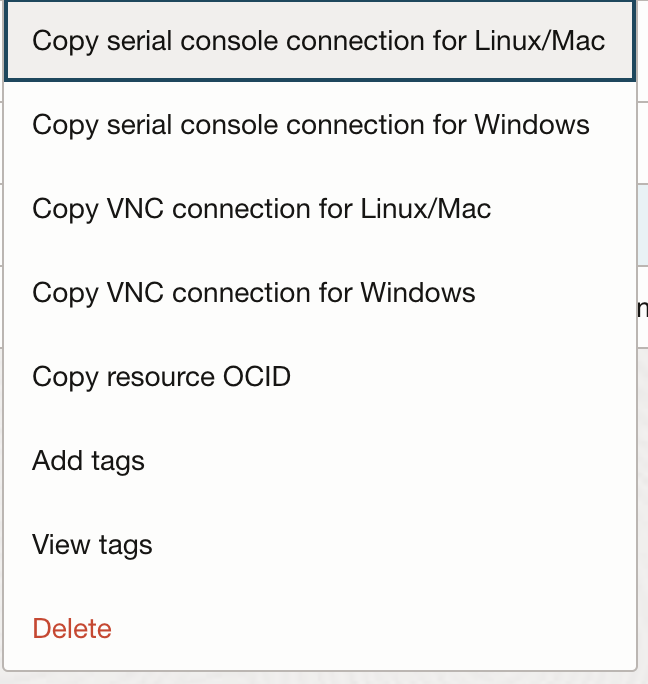 Alternatively you can launch the cloud shell connection.
However, whatever method I use, it prompts me to type in the password, which i never set before (or i forget). I’ve tried every password that I can use, but it fails to login.
Alternatively you can launch the cloud shell connection.
However, whatever method I use, it prompts me to type in the password, which i never set before (or i forget). I’ve tried every password that I can use, but it fails to login.
Mount Rescue Boot Volume
After several hours’ struggling, I find that if I need to login, I need to mount the rescue image to reset the password. To get the rescue boot volume, I need to create a new instance with the same type, for which I am supposed to upgrade my account to Pay as you go. (If you still have the free tier machine quota, you can use that as well.) It requires less than 12 hours to process. There is an email for notification.
The following process may involve the payment. You are recommended to be prepared before you start to save your money.
Before attaching the boot volume, we should stop the original instance. In the Oracle Cloud Console, navigate to your instances and click stop to shut down the instance.
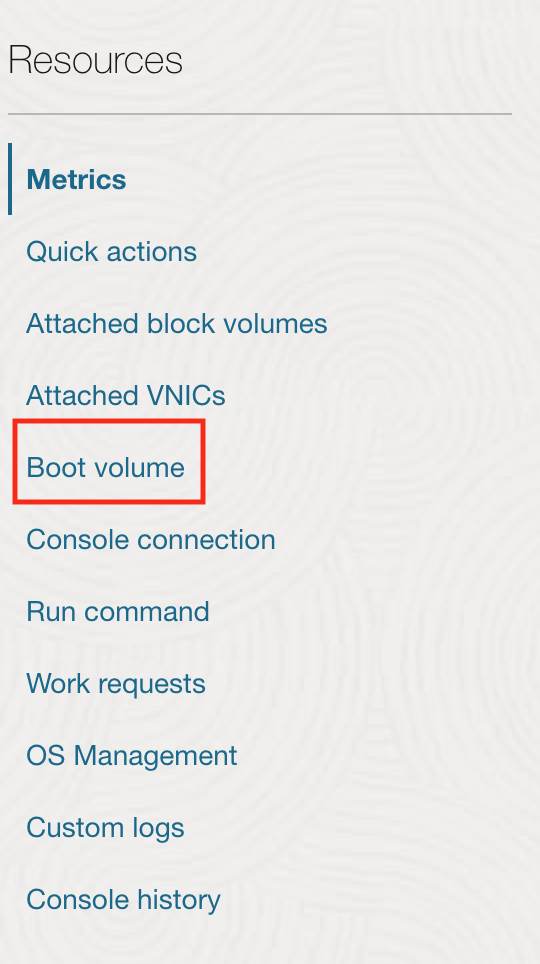
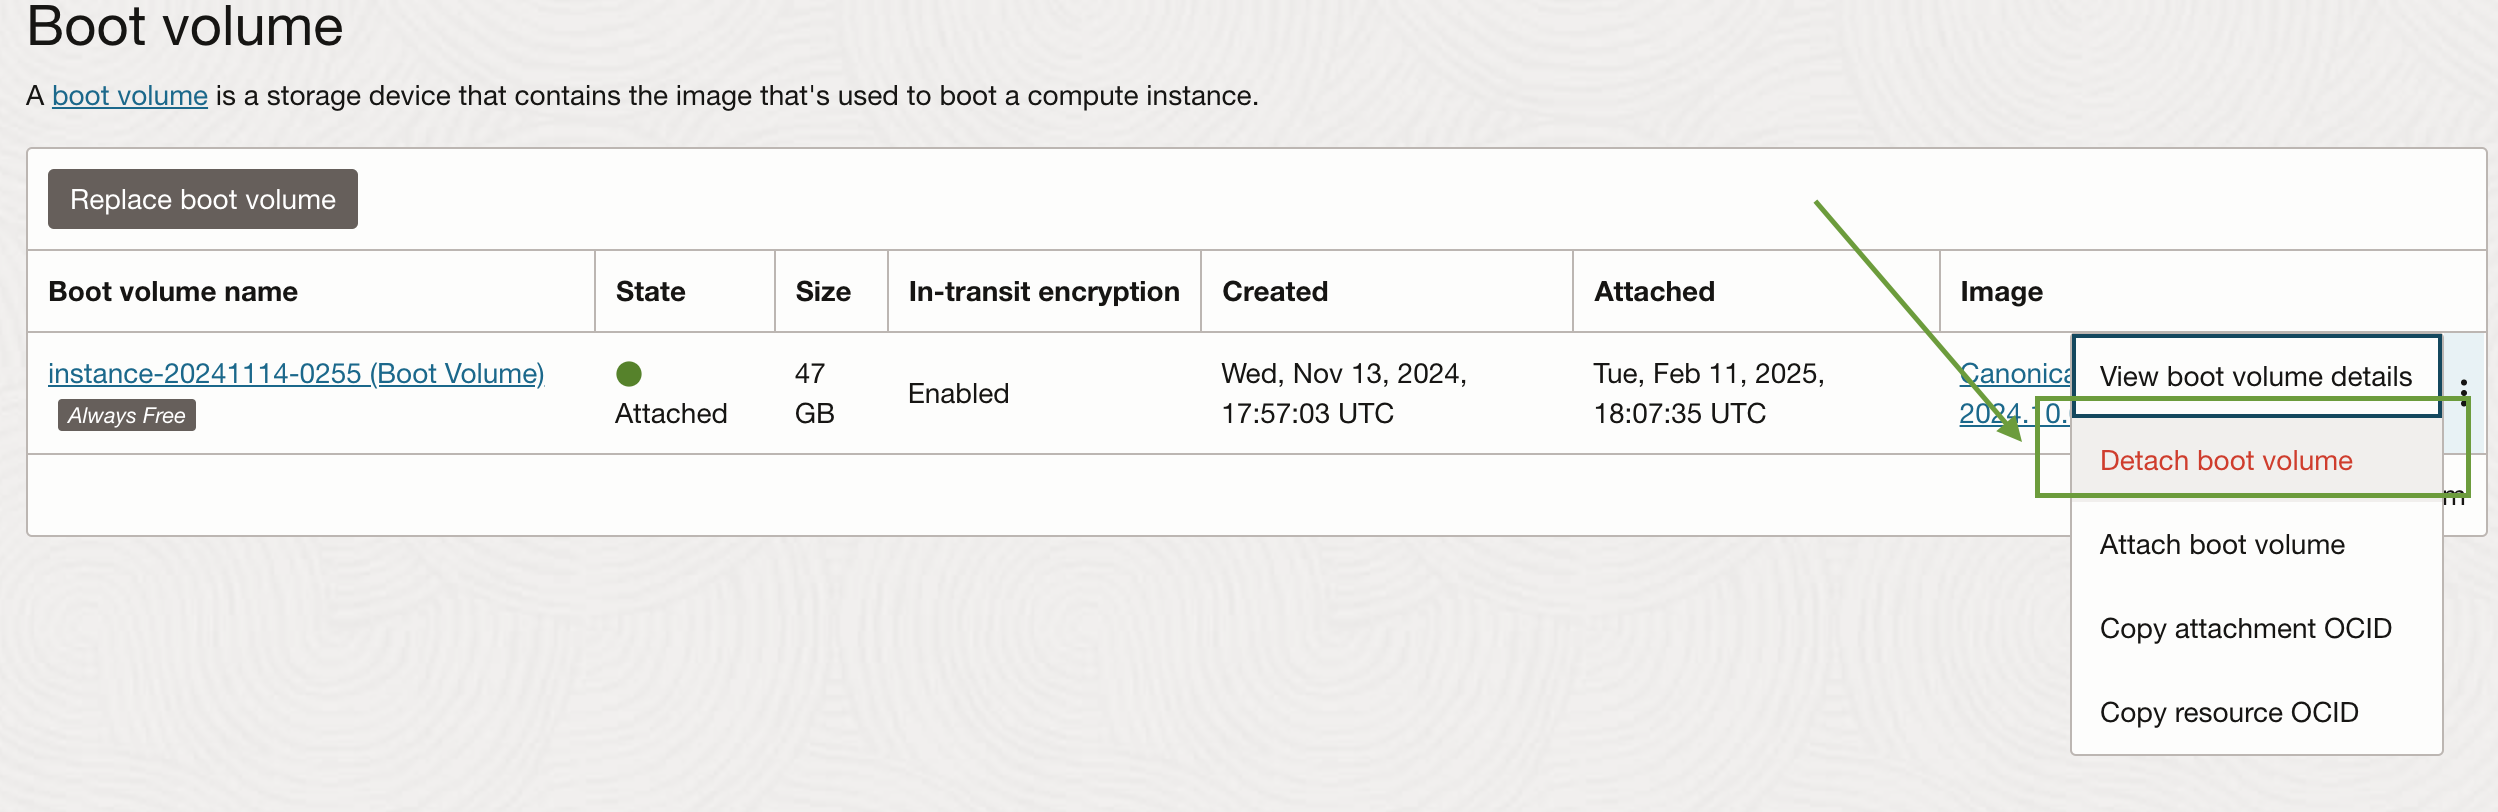
Once it is stopped, we need to detach the boot volume. On the instance details page, scroll down to the Boot Volume section. Find the volume name and click detach the boot volume from the instance.
 Then we create a temporary instance. Configure it with the minimal resources. Upload the SSH key for login. Launch the instance and note the public IP address.
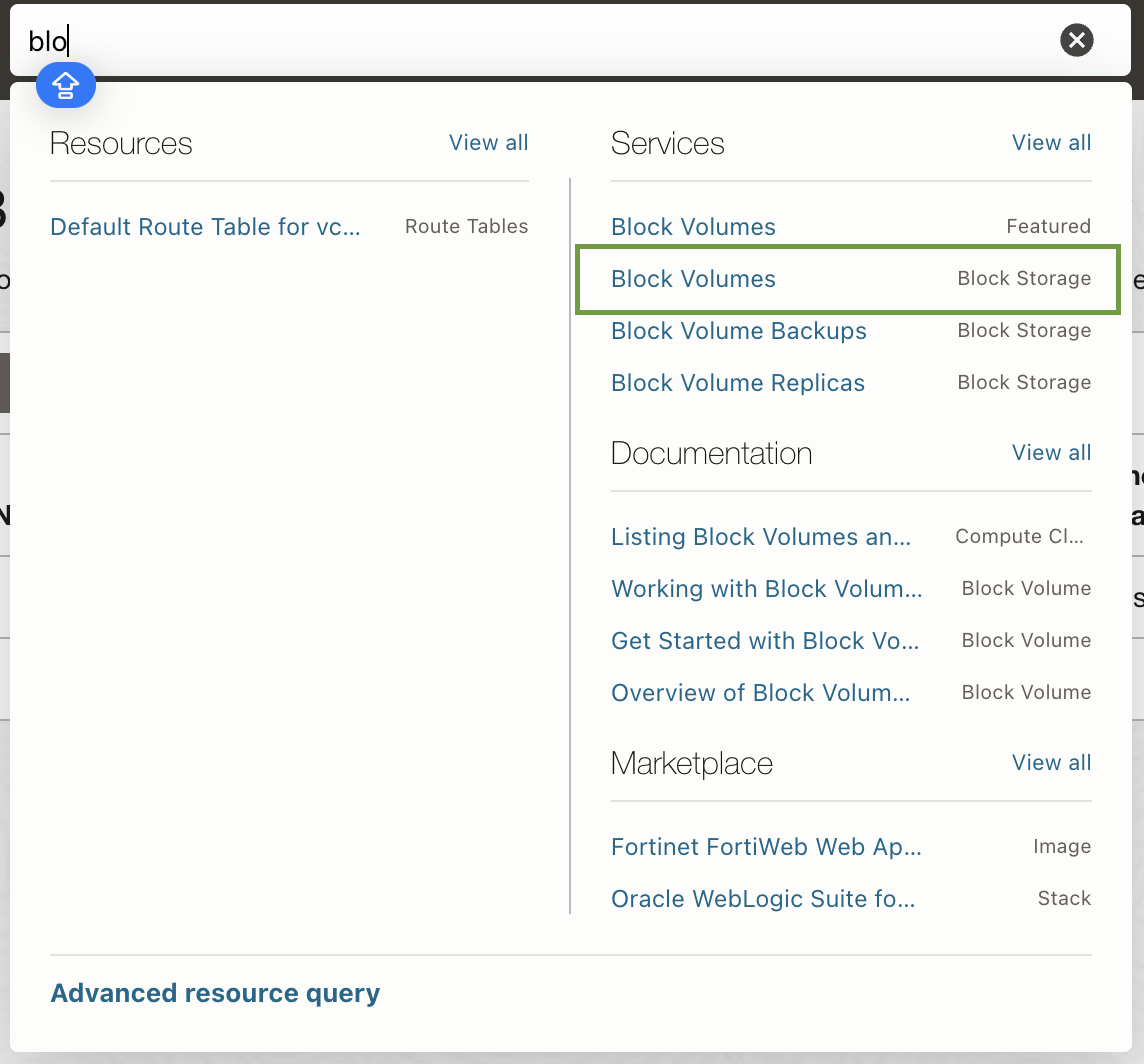
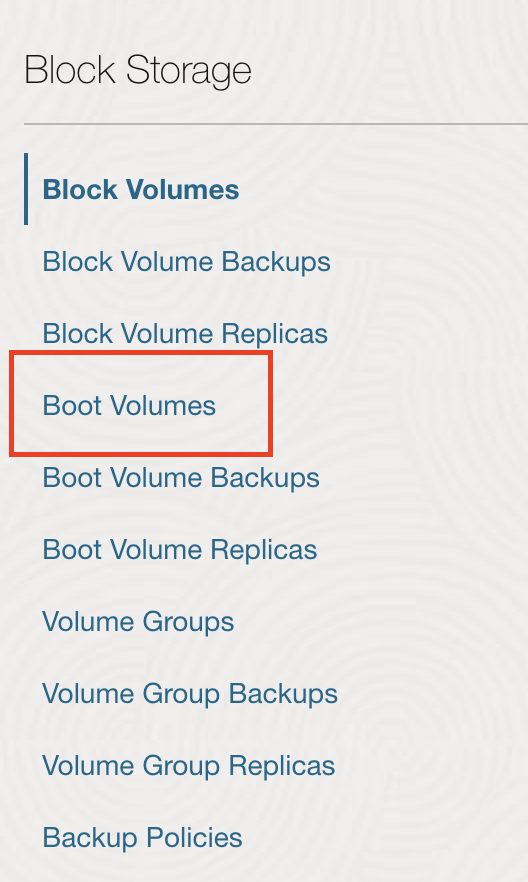
Afterwards, we attach the detached boot volume to the temporary instance. Navigate to Block Storage and find Boot Volumes.
 Find the boot volume we detached earlier and click its name. Click
 Attach to Instance and select the newly created temporary instance. Choose Paravirtualized as the attachment type and click Attach.
Once the boot volume is attached, we need to mount it on the temporary instance to access its files. On the local terminal, we use ssh to connect to the temporary instance and identify the attached disk:
lsblk
The boot volume will typically appear as /dev/sdb or similar.
ubuntu@instance-20250212-0131:~$ lsblk
NAME    MAJ:MIN RM  SIZE RO TYPE MOUNTPOINTS
loop0     7:0    0 48.8M  1 loop /snap/core18/2848
loop1     7:1    0 26.2M  1 loop /snap/oracle-cloud-agent/73
loop2     7:2    0 33.7M  1 loop /snap/snapd/21761
sda       8:0    0 46.6G  0 disk
├─sda1    8:1    0 45.6G  0 part /
├─sda15   8:15   0   99M  0 part /boot/efi
└─sda16 259:0    0  923M  0 part /boot
sdb       8:16   0 46.6G  0 disk
├─sdb1    8:17   0 45.6G  0 part
├─sdb15   8:31   0   99M  0 part
└─sdb16 259:1    0  923M  0 part
As can be seen from the above, the boot volume is /dev/sdb1. We create the Mount Point,
sudo mkdir /mnt/boot-volume
and mount the boot volume:
sudo mount /dev/sdb1 /mnt/boot-volume
Then we access the files. Sometimes we need to remount the filesystem as read-write
sudo mount -o remount,rw /mnt/boot-volume
Then we can view the contents of /mnt/boot-volume/etc/shadow. You can find one line:
ubuntu:!:20040:0:99999:7:::
The overall format is:
username:password:last_change:min_age:max_age:warning_inactive:expire:disable
So the ubuntu has no password, where ! means the account is locked.
We can replace the ! or * with an empty value. Alternatively, we can generate a hashed password,
openssl passwd -6
and you will be prompted to enter and confirm a new password, like
$6$randomsalt$hashedpassword...
Copy the whole to replace the !.
ubuntu:$6$randomsalt$hashedpassword...:20040:0:99999:7:::
Once finished, we can unmount the boot volume.
For now, we have set up the initial password for the boot volume. We then reattach the boot volume to the original instance. First detach from the temporal instance and reattach it to the original instance. Click Start to start the original instance.
Afterwards, we should be able to login to the serial console. Then we modify the /etc/wireguard/wg0.conf to remove the initial changes.